How to use Indigo proxy: guide
Indigo now offers its own built‑in proxy service. With it, you can access over 30 million premium residential IPs — directly from your profile settings.
With every Indigo account that has a paid subscription, you get bonus proxy traffic. The bonus never expires, and when you run out of traffic, it's easy to top up.
Check What you need to know about Indigo proxy to learn more about flexible plans, top‑tier IPs, super sticky sessions up to 24 hours, bandwidth rollover, and the IP quality filter.
Tip: You can always switch locations and rotation later in the Advanced mode.
Choose profile type
- Regular profile
- Quick profile
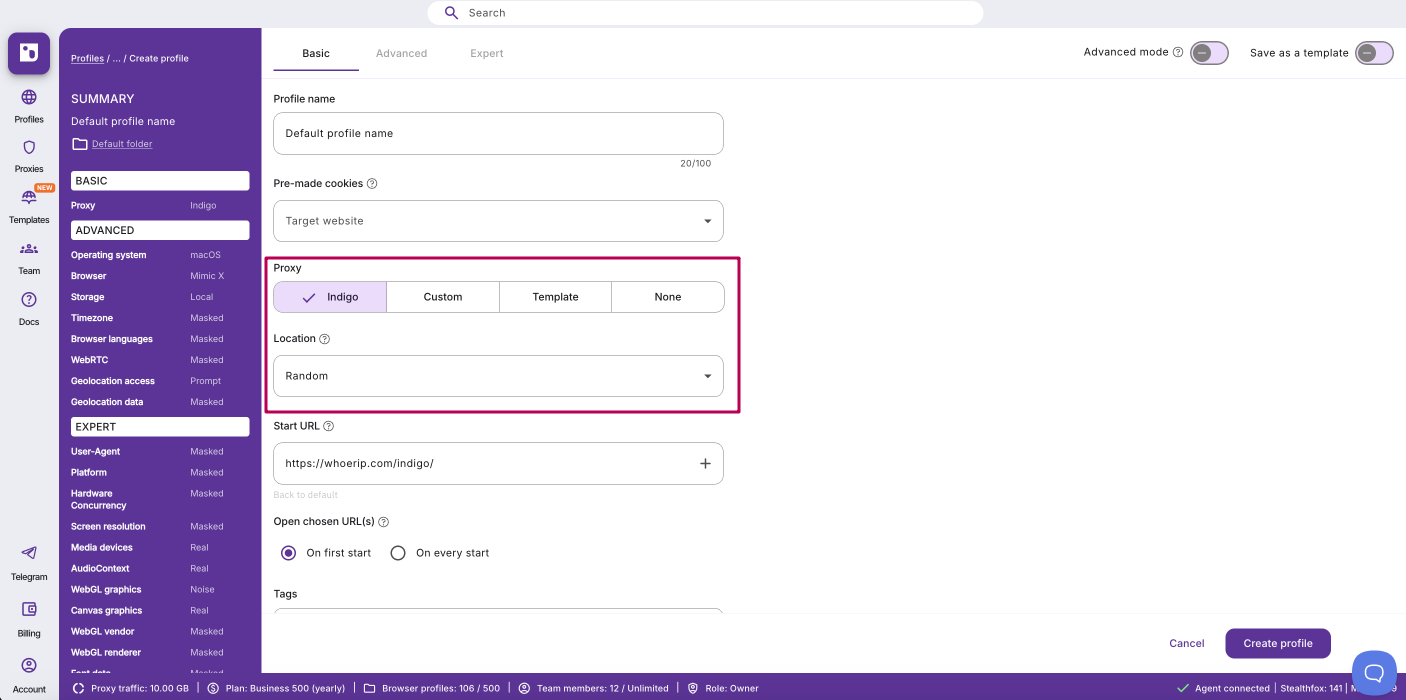
Basic proxy setup: get started fast
Setting up your Indigo proxy is super easy. Just a few clicks, and you’re ready to browse with a fresh, premium IP from the location you choose.
- Open your profile settings and find the "Proxy" section
- Select "Indigo" as your proxy type
- Choose the location you want your IP to appear from
- That’s it — your profile is connected to a premium proxy for smooth, anonymous browsing
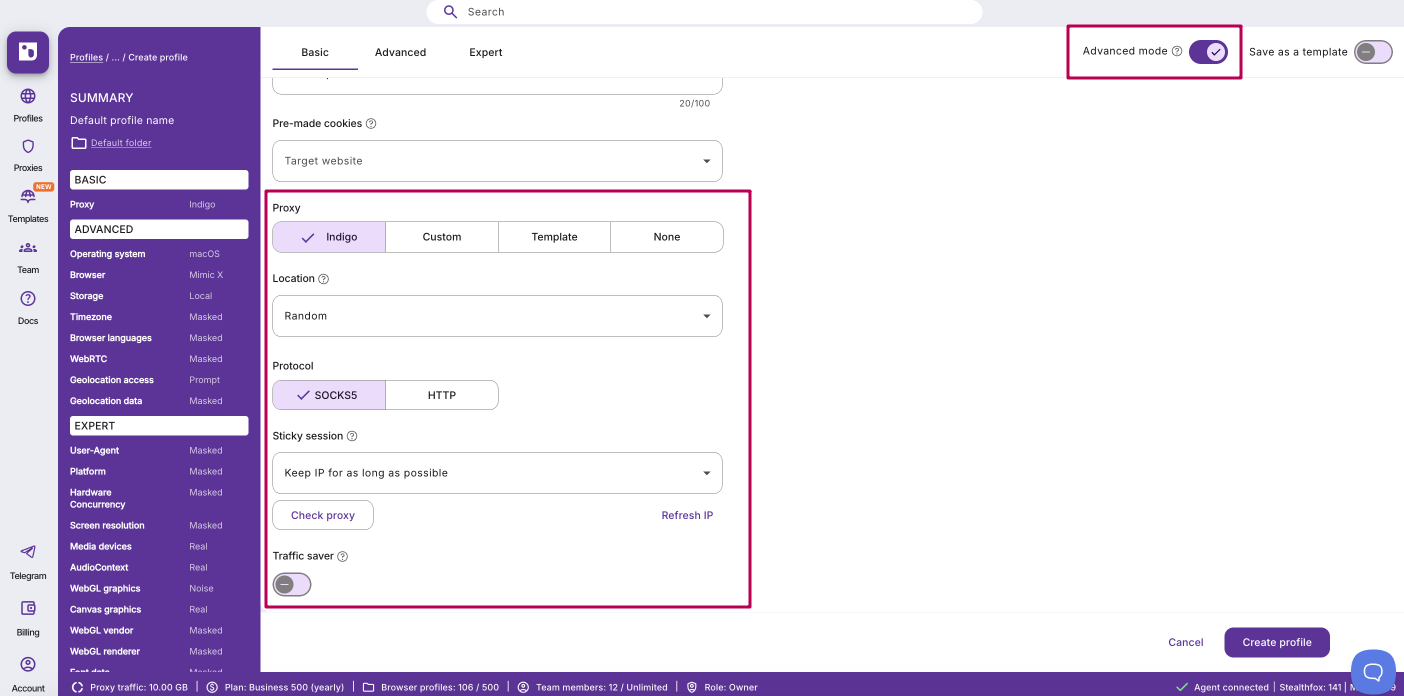
Advanced proxy settings: take full control
For more control over your proxy connection:
- Open your profile settings and find the "Proxy" section
- Toggle on "Advanced mode" at the bottom of your profile settings
- Choose a protocol (HTTP or SOCKS5)
- Set an IP rotation method:
- Keep IP for as long as possible — your IP rotates on average every ~24h
- Custom, sec — specify the rotation frequency in seconds
- Get new IP — switch to a new IP with one click
- Click "Check proxy":
- "Proxy check passed" — Indigo connected successfully and retrieved IP‑dependent data
- "Proxy check failed" — Indigo couldn't connect. See How to fix profile launch or proxy connection issues
- If needed, enable the proxy traffic saver
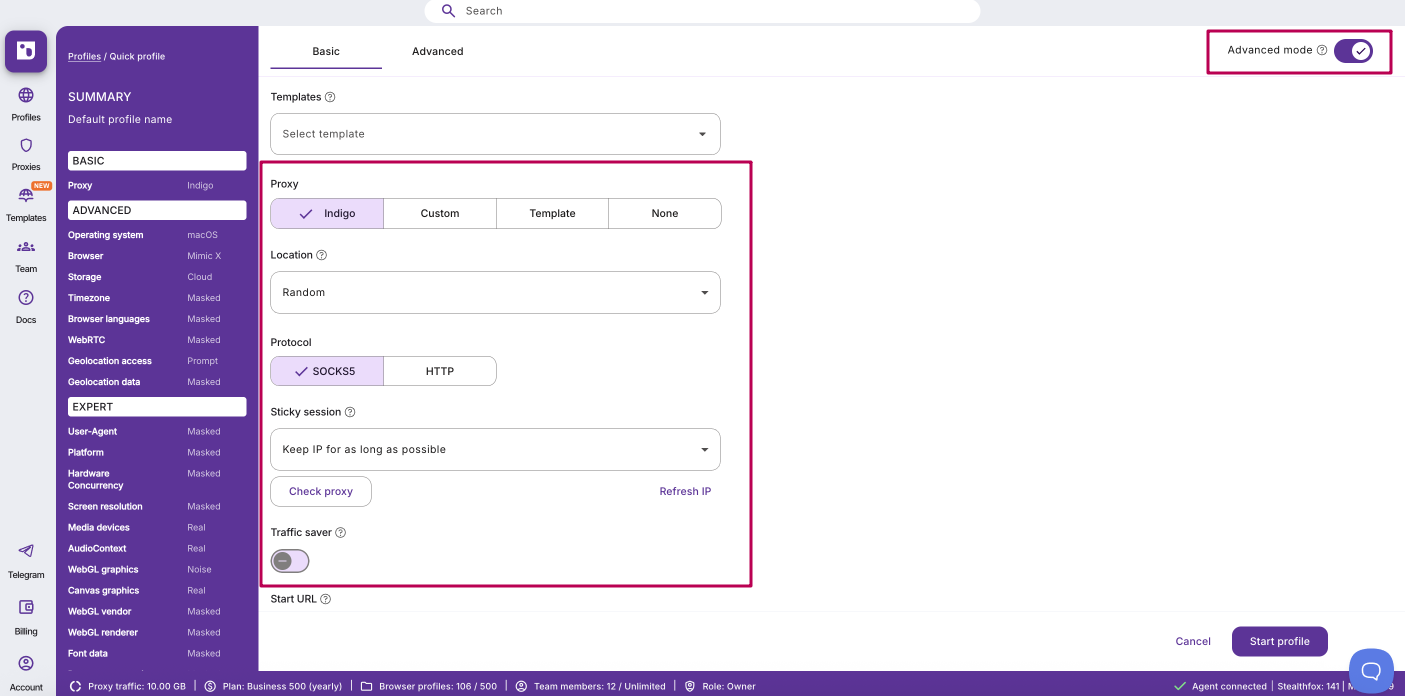
Here's what you can do in "Basic" settings:
- Select "Indigo" as the proxy type
- Select a location by specifying the country
If needed, switch on "Advanced mode" to:
- Select the region and city you need
- Select the protocol (HTTP or SOCKS)
- Set an IP rotation method:
- Keep IP for as long as possible — average ~24h rotation
- Custom, sec — specify the rotation frequency in seconds
- If needed, enable the proxy traffic saver
How to check your IP and fingerprint
Ready to see if your setup is airtight? Checking your fingerprint helps ensure everything looks smooth and legit.
Use these tools to inspect your browser fingerprint:
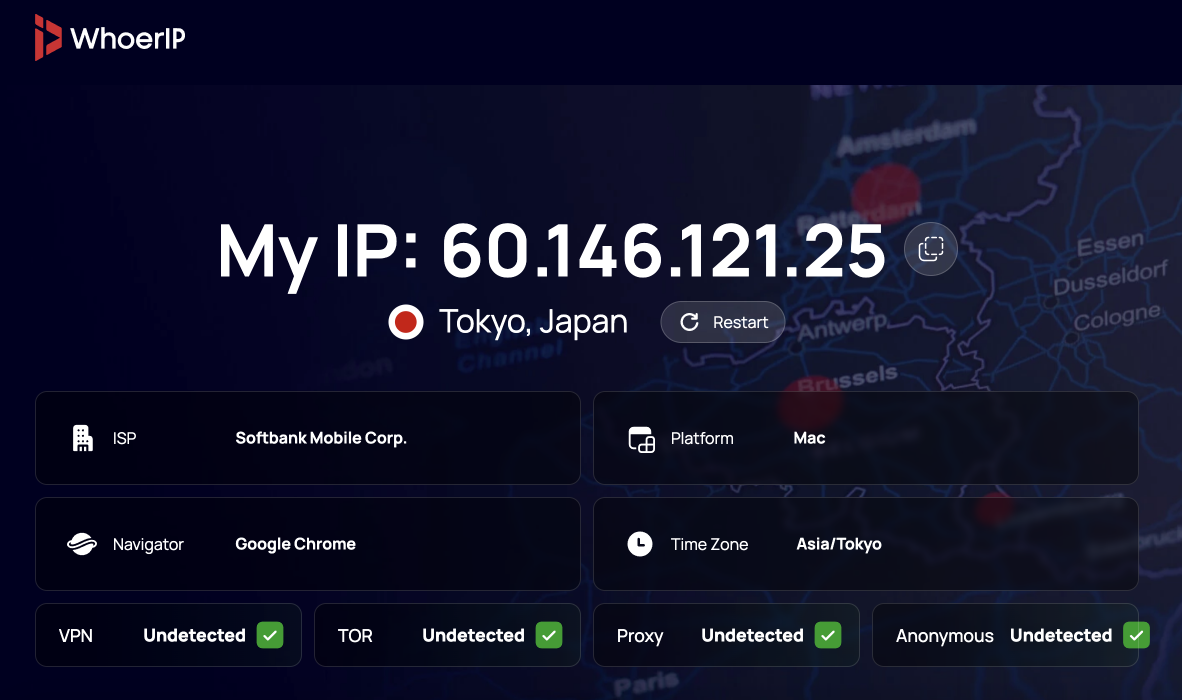
- Whoer IP — check your IP matches your intended location (default Indigo checker)
- Pixelscan — detailed browser fingerprint
- BrowserLeaks — spot inconsistencies that might expose your real identity
Can websites see I've visited the Whoer IP page or other checkers?
No. Websites can only access cookies associated with their own domain. Indigo cookies are only visible to Indigo; Facebook will only see its own cookies. This isolation is called the Same‑origin policy (SOP).
Here's how to check your fingerprint:
- Open your Indigo profile
- Use one of the tools above to test your fingerprint
- Look for inconsistencies in IP address, browser version, or OS
- Adjust your settings in Indigo to fix any mismatches
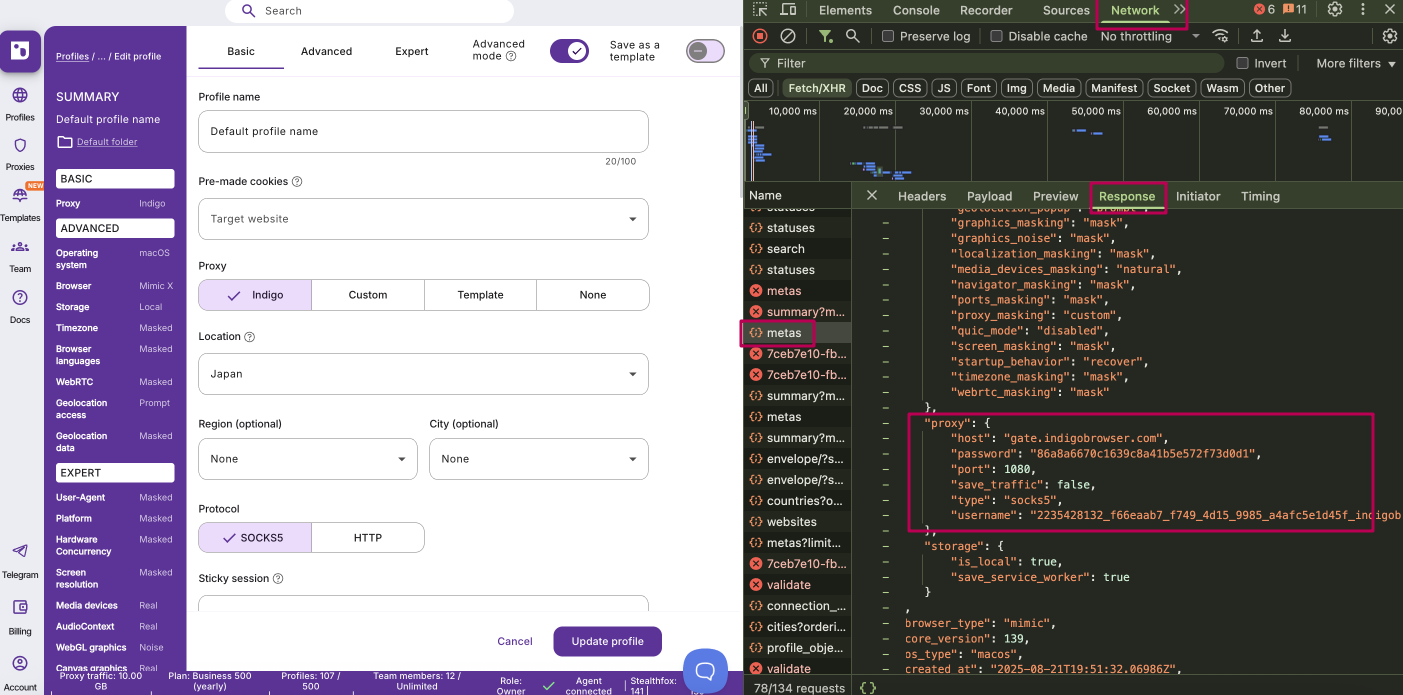
How to retrieve Indigo proxy details
Follow the steps below to get Indigo proxy details from a profile:
- Open your profile settings
- Open DevTools:
- Windows and Linux: Ctrl + Shift + I
- macOS: Cmd + Option + I
- Switch to the "Network" tab in DevTools
- In the logs, find and click on
metas - Switch to the "Response" tab — you'll find proxy details: host, password, port, type, username