Indigo X: Quick Start Guide
🚀
Welcome to Indigo X
Indigo X is a tool for secure and convenient work with browser profiles. In this guide, we'll show you how to quickly register, install the necessary components, and get started.
Step-by-Step Guide
Step 1. Registration
- Go to the website: https://indigobrowser.com/
- Click "Register"
- Enter your email
- Send the received code to the Telegram bot
- After verification, create a password and complete account creation
After this, you'll be taken to the Indigo X interface
Step 2. Installing the Agent
- Download and install the Indigo X agent
- Launch the agent
- Make sure the browser interface shows "Agent connected" status
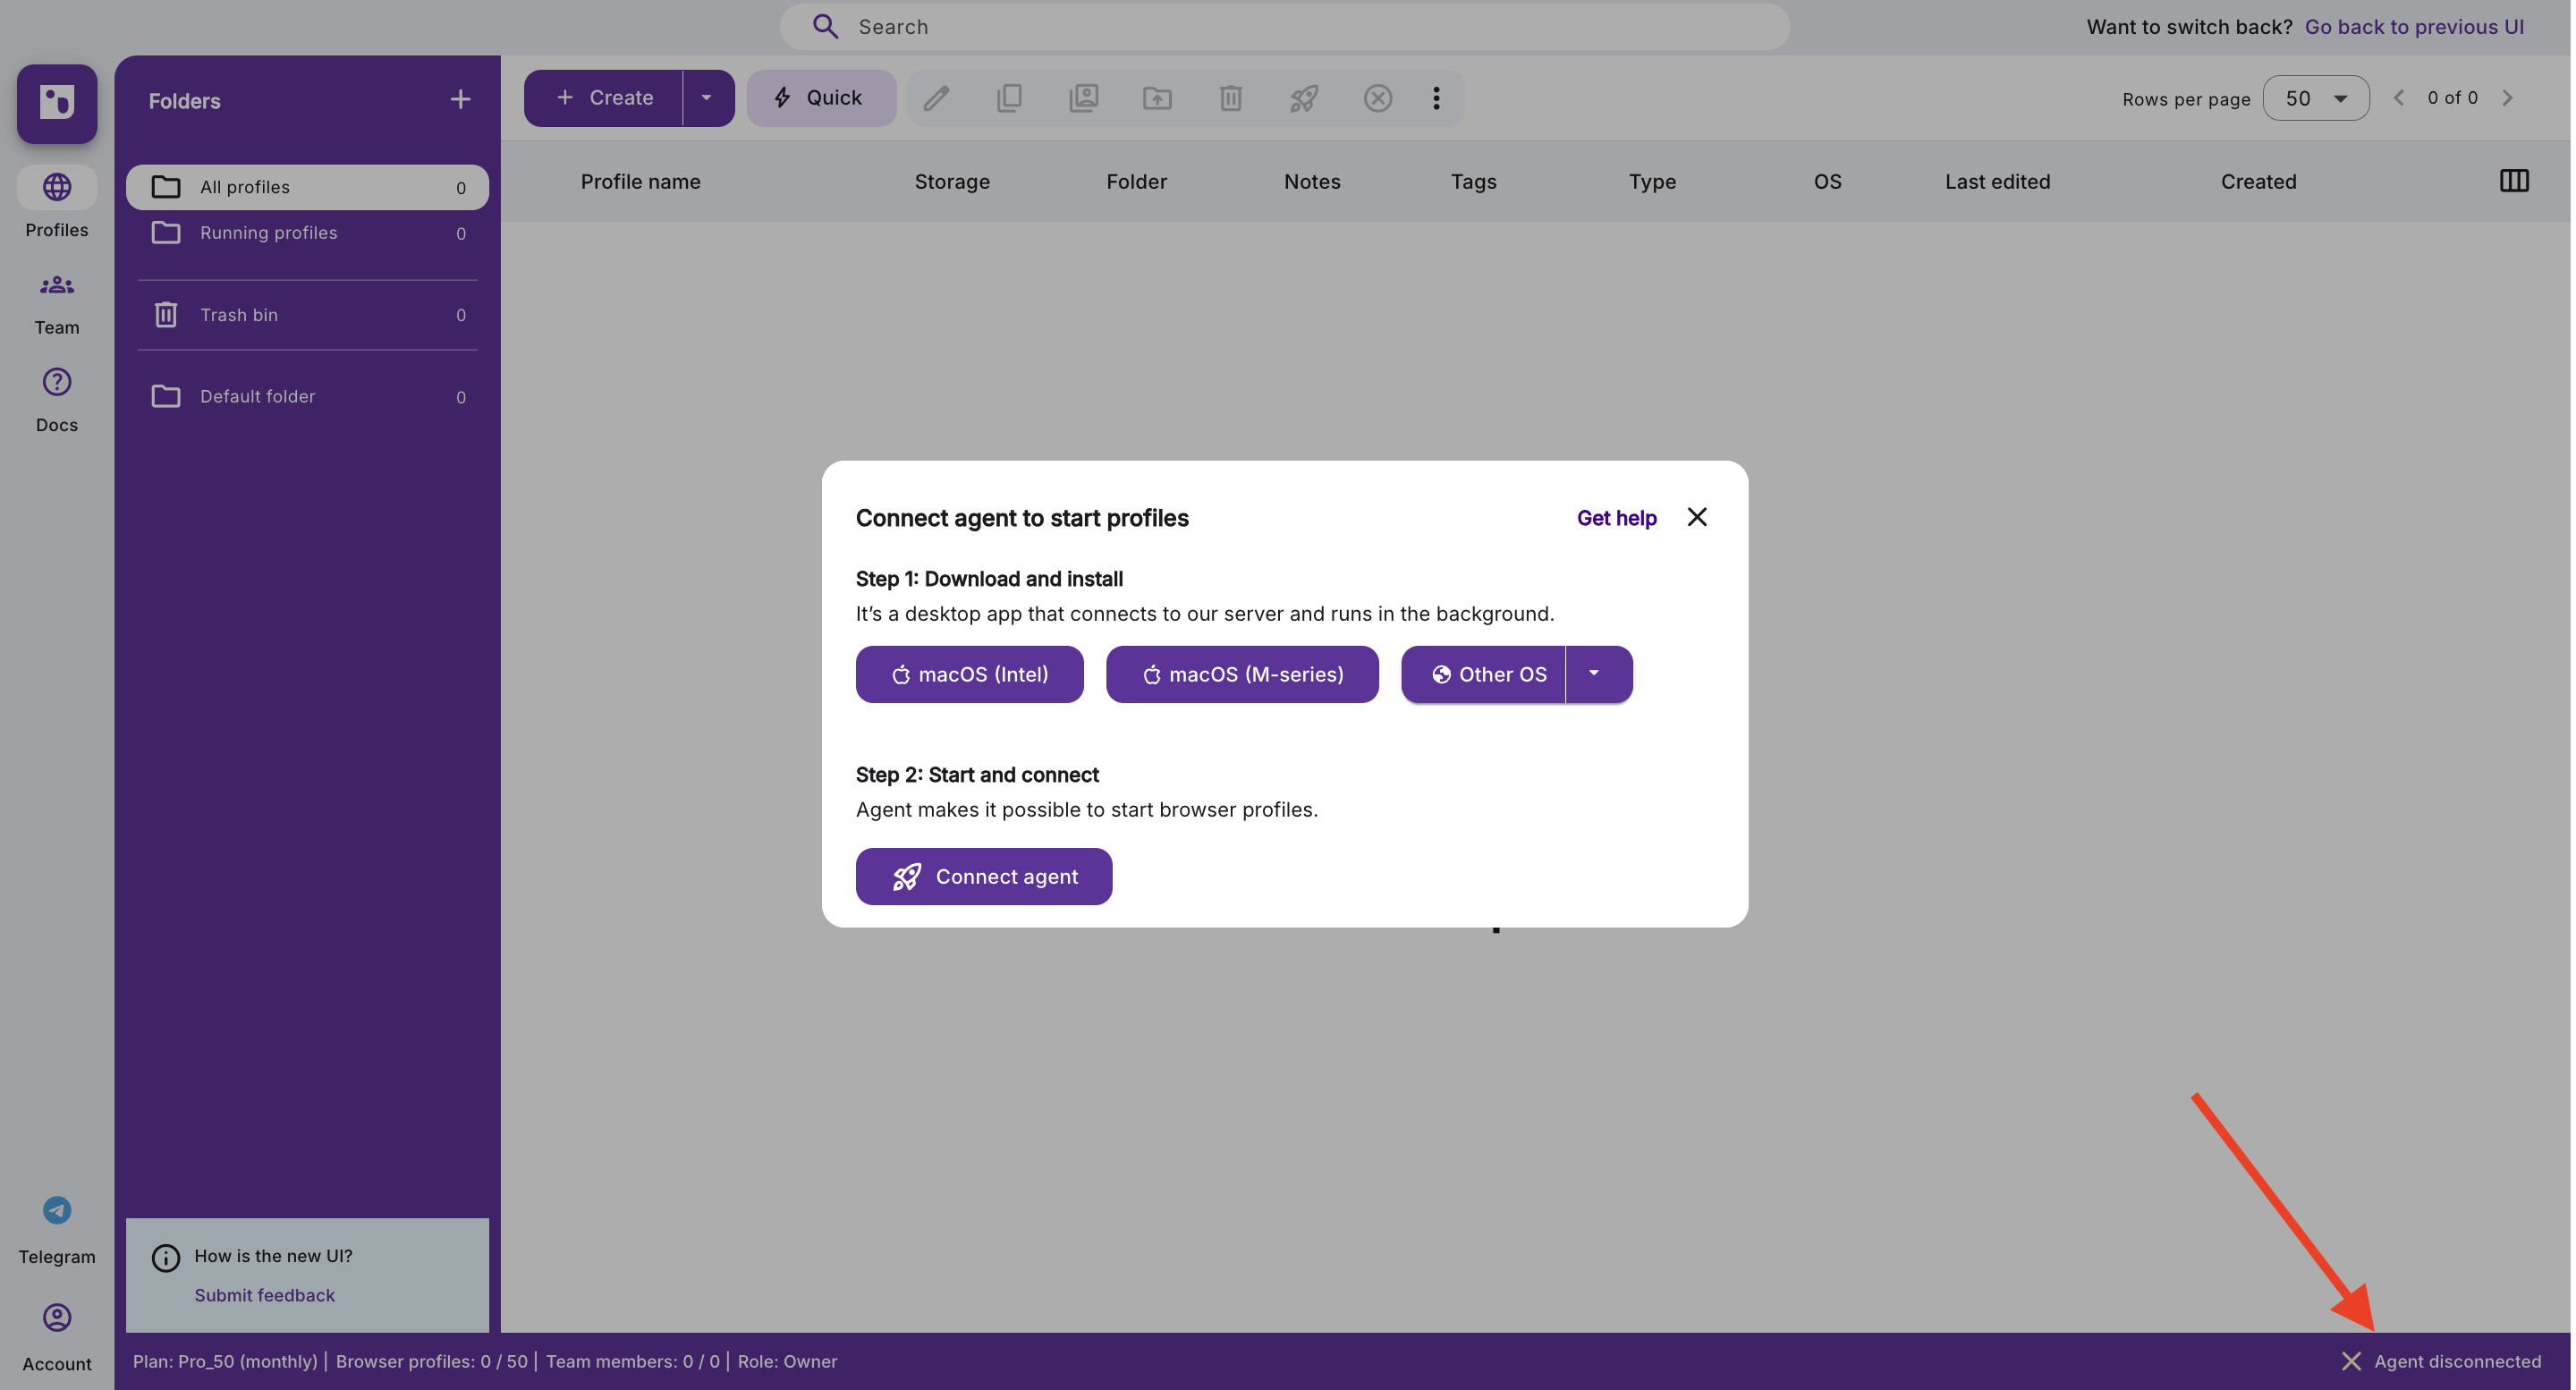
Important: Profile launch is impossible without the agent
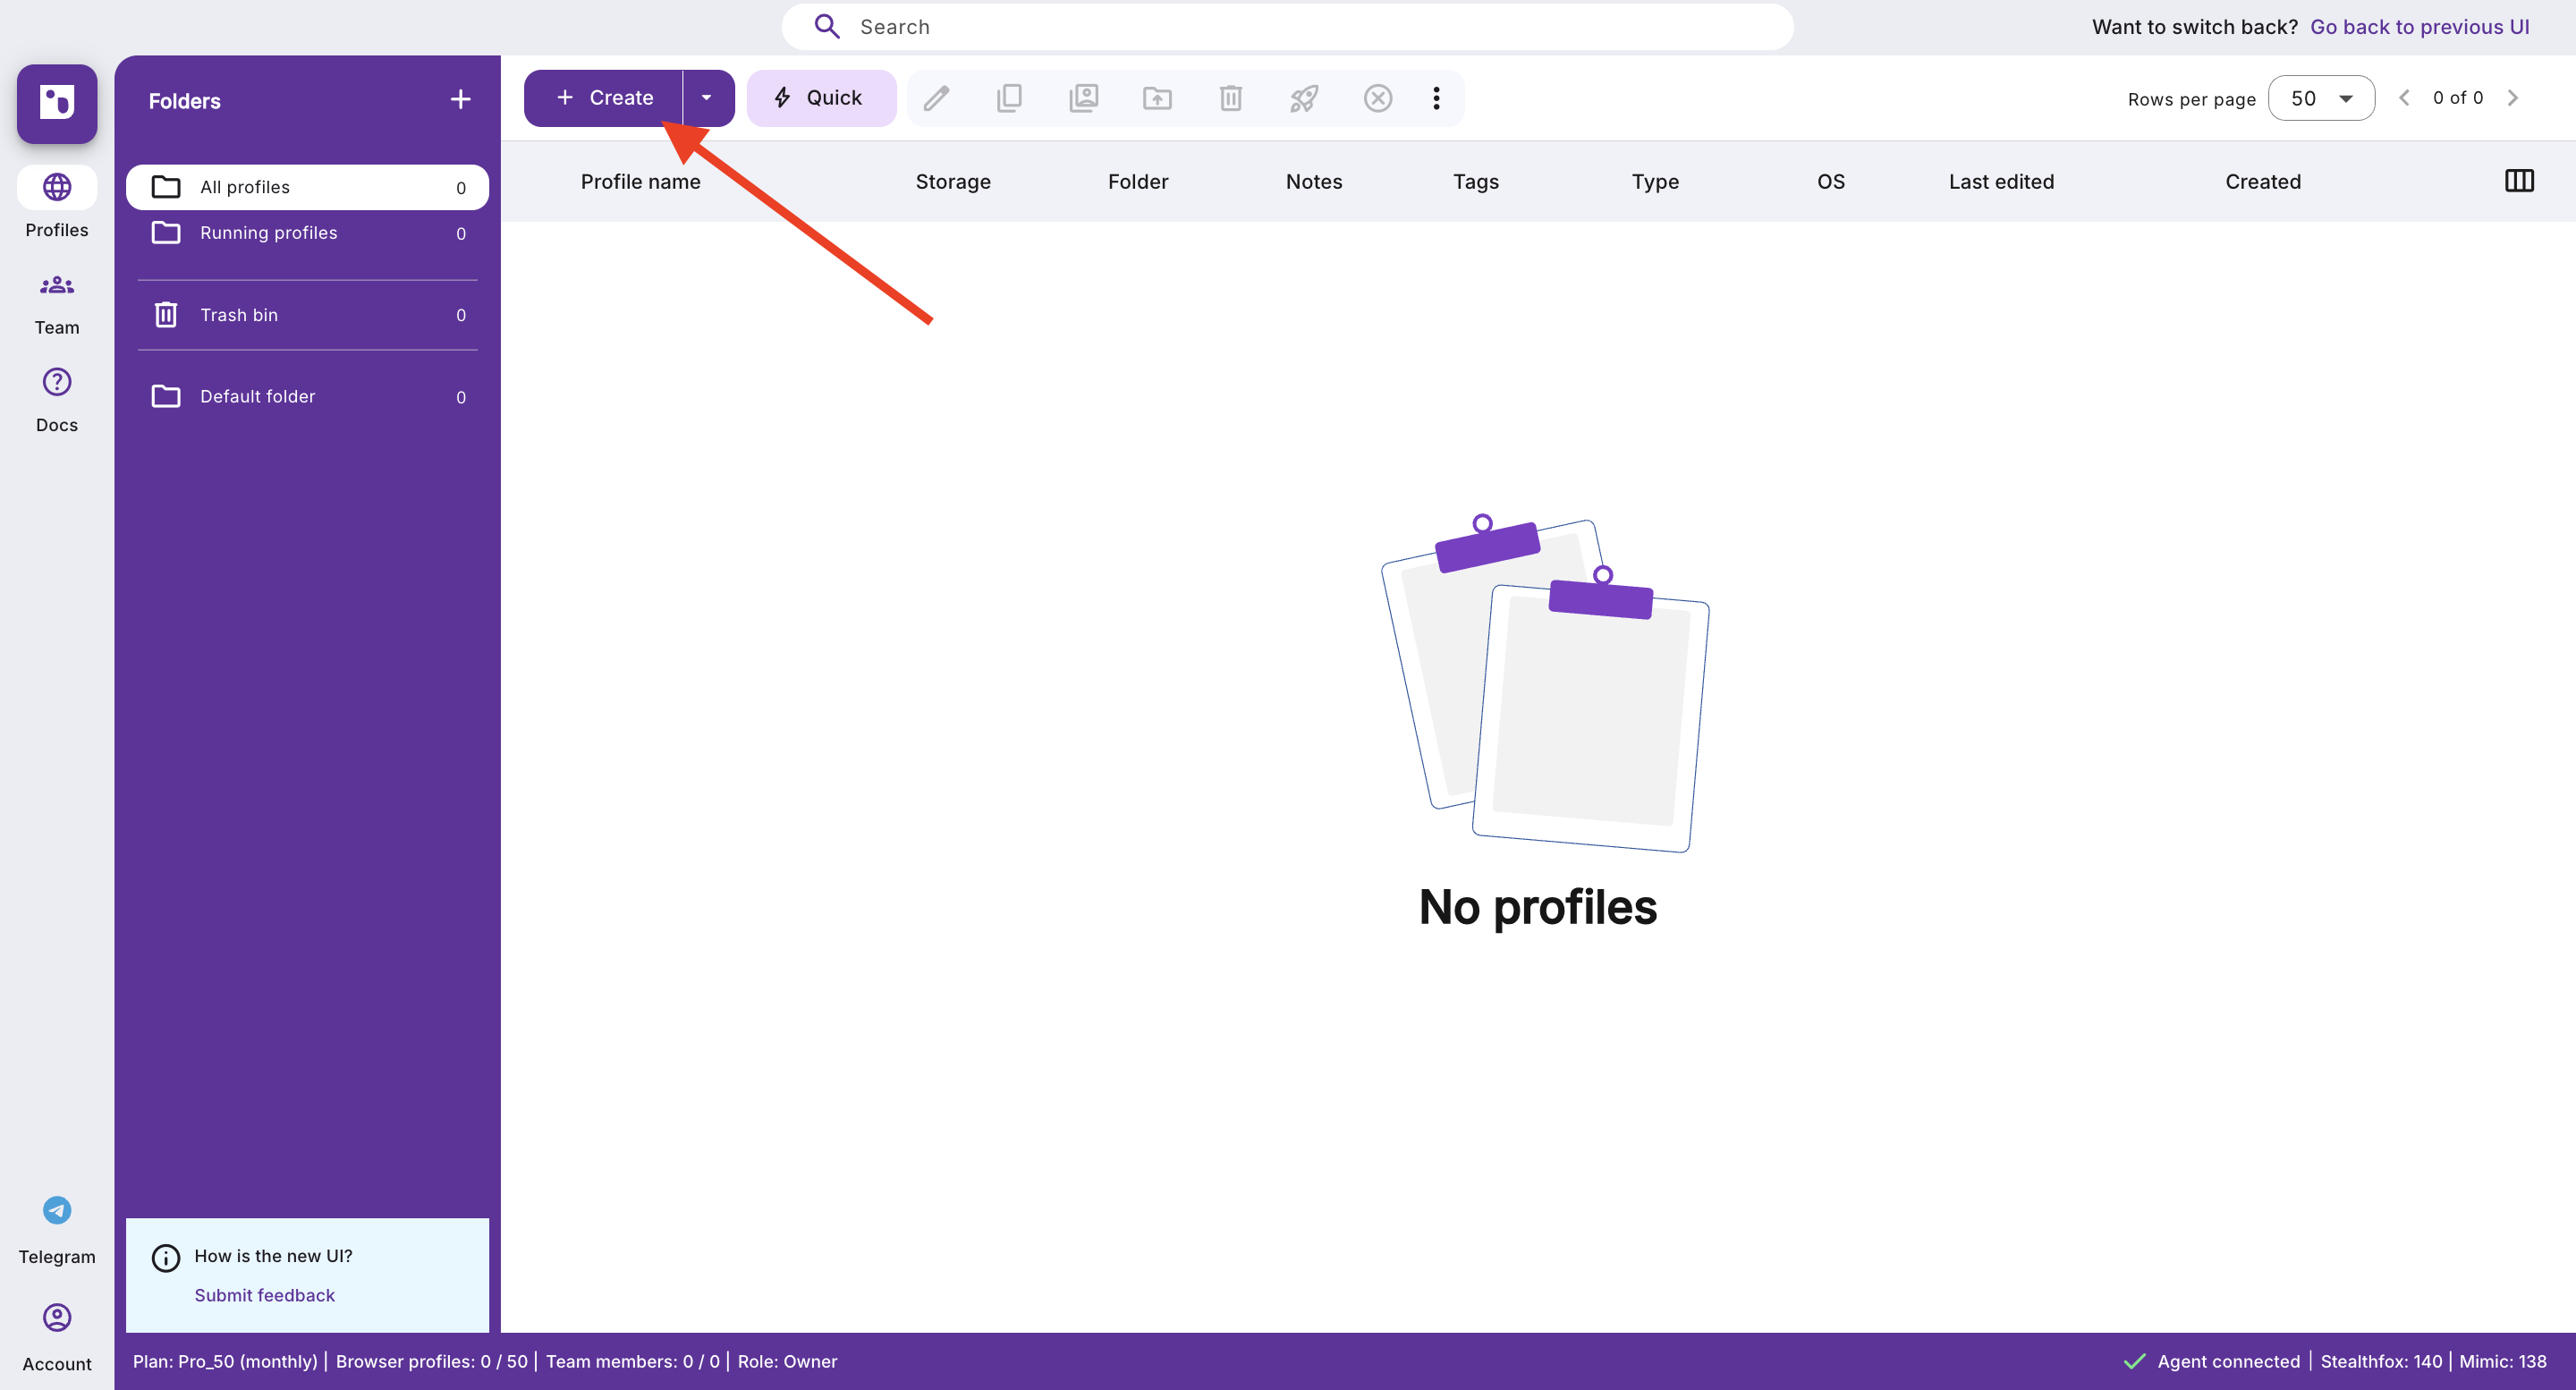
Step 3. Creating a Profile
- Click the "Create" button
- In the opened form, specify:
- Profile name
- Proxy
- (optional) ready cookies, tags, notes
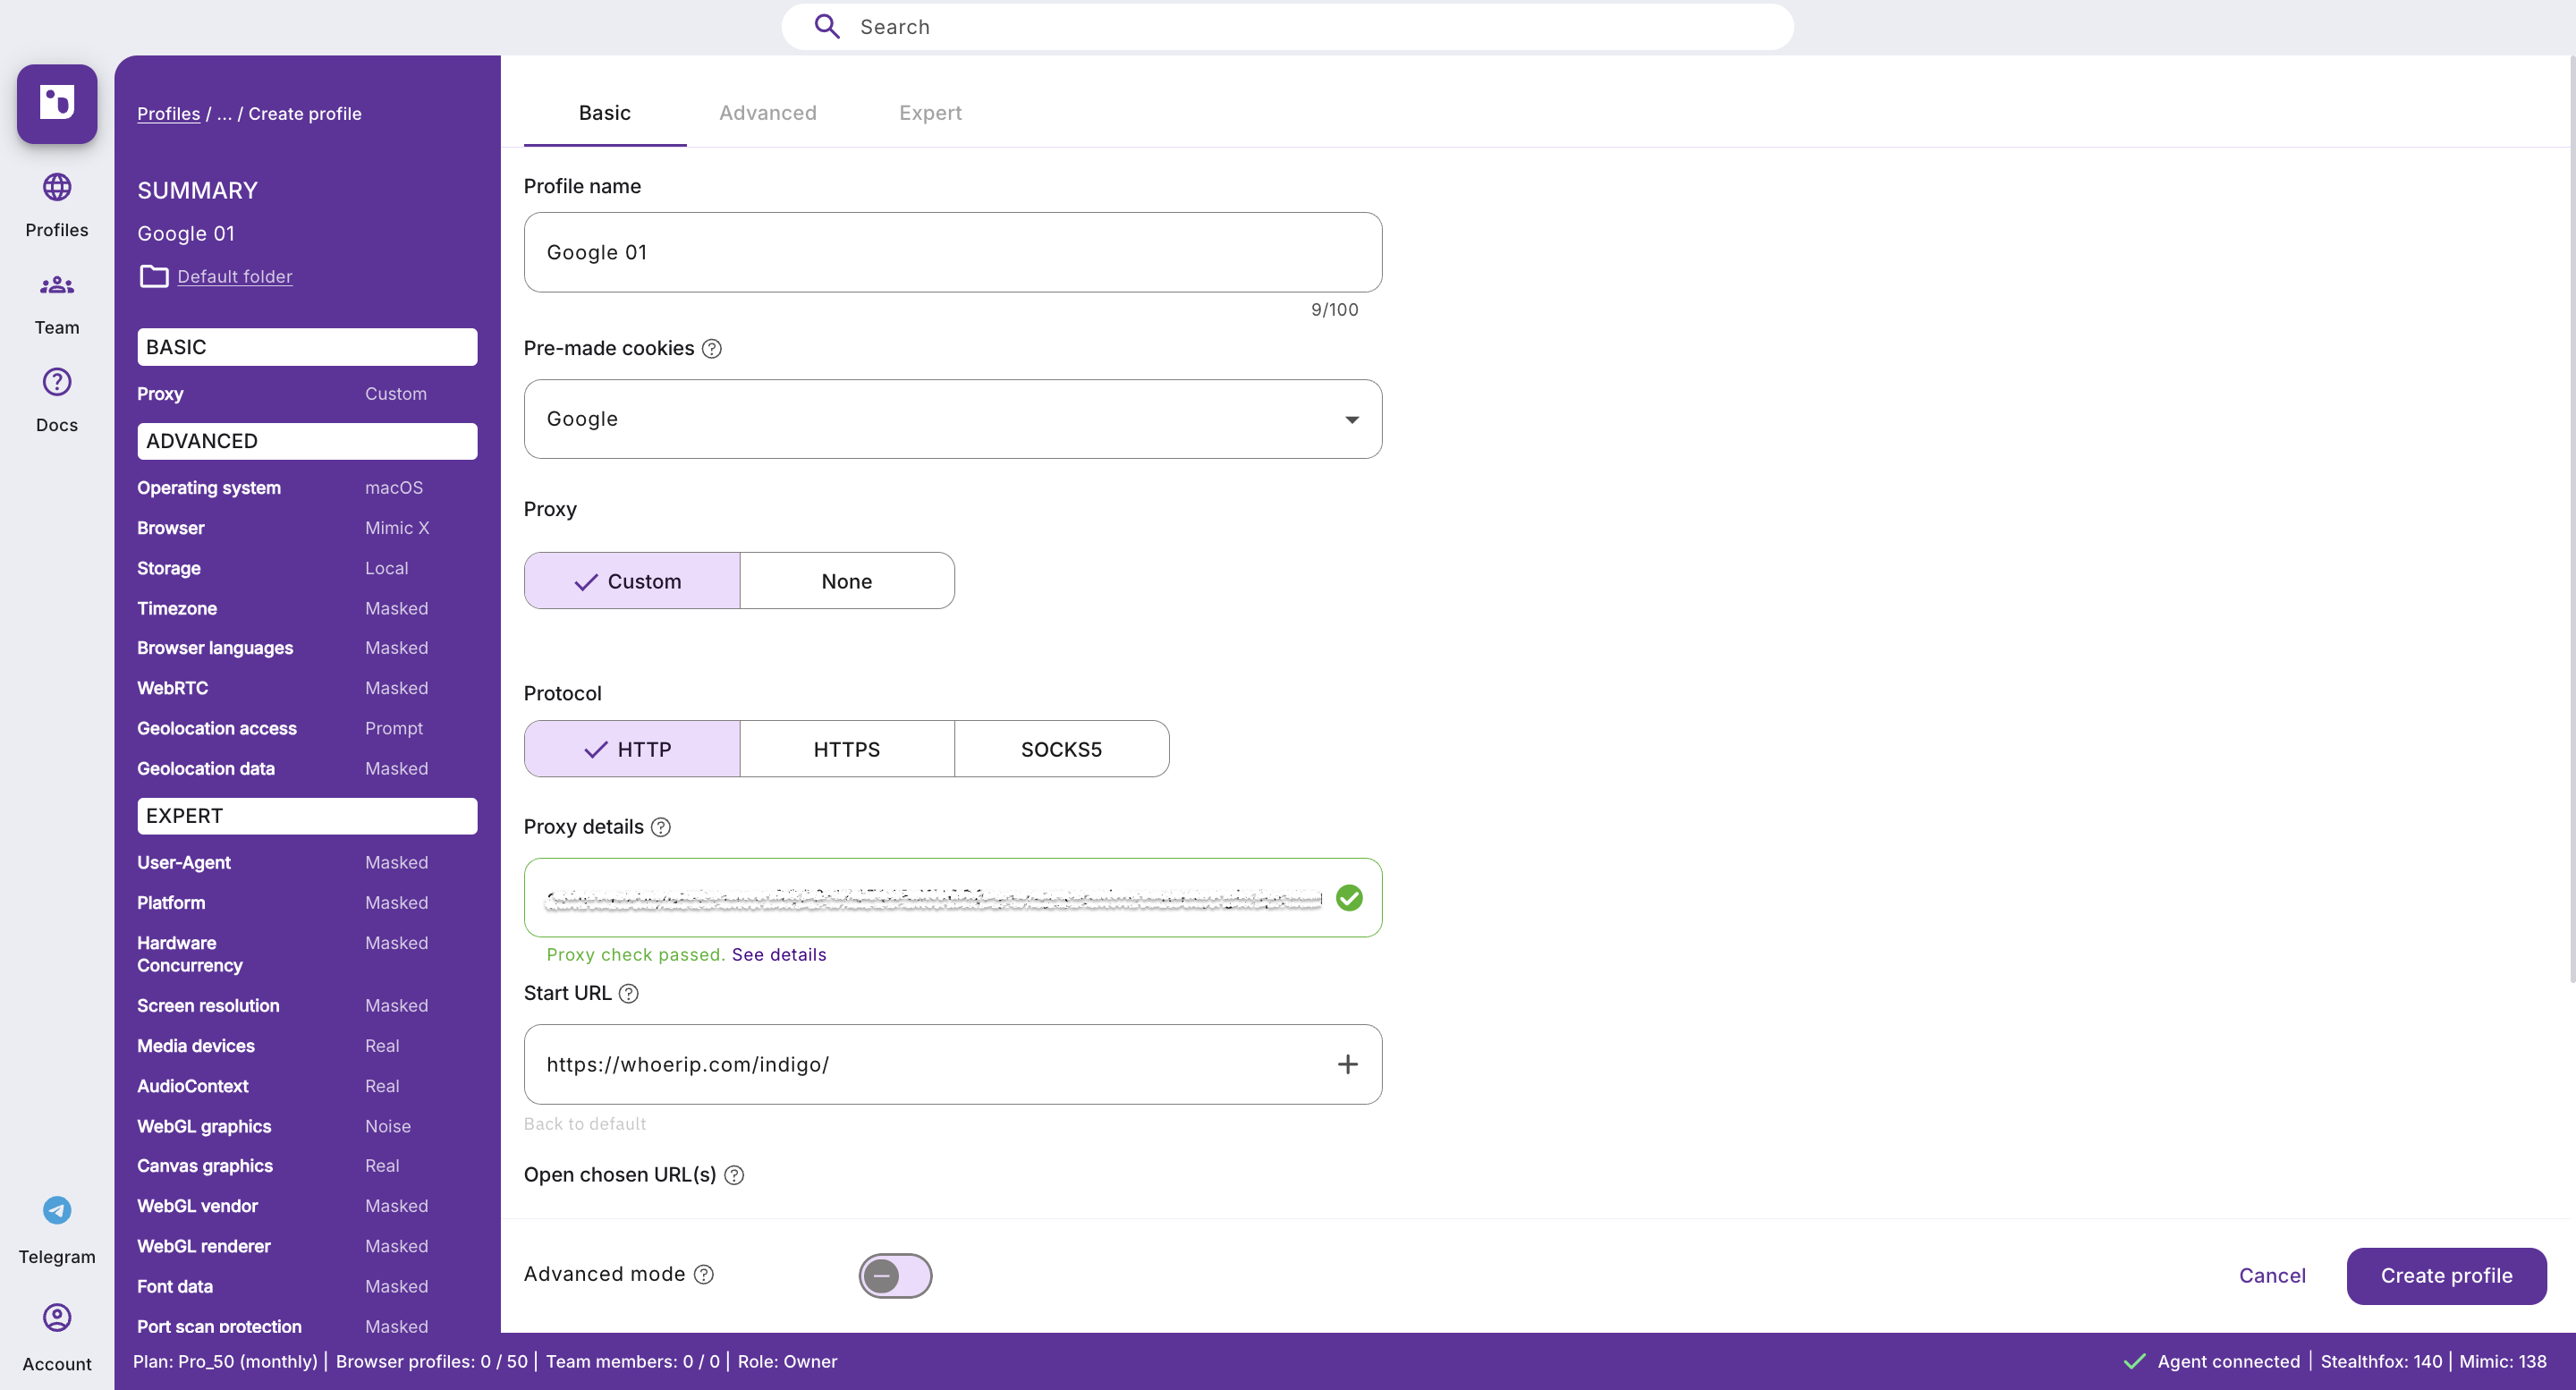
💡 Tip
If desired, you can enable "Advanced Mode" when creating a profile — it will provide access to additional parameters such as WebRTC, Canvas, geolocation, fonts, etc.
- Click "Create Profile"
Step 4. First Launch
On the first launch of the profile, the necessary browser components will be automatically downloaded. After the download is complete, the profile will open and you can start working.
Congratulations! You're now ready to work with Indigo X
What's Next?
Need Help?
If you have questions, contact our support team.